AI photo editor for social media
Give a real photo a careful finish
Start with your own photo, choose the lightest useful finish, and review the result before it becomes part of a post.
- Plan
- Create
- Review
- Move forward
Inside the app
See it in ClientWorkSystem.
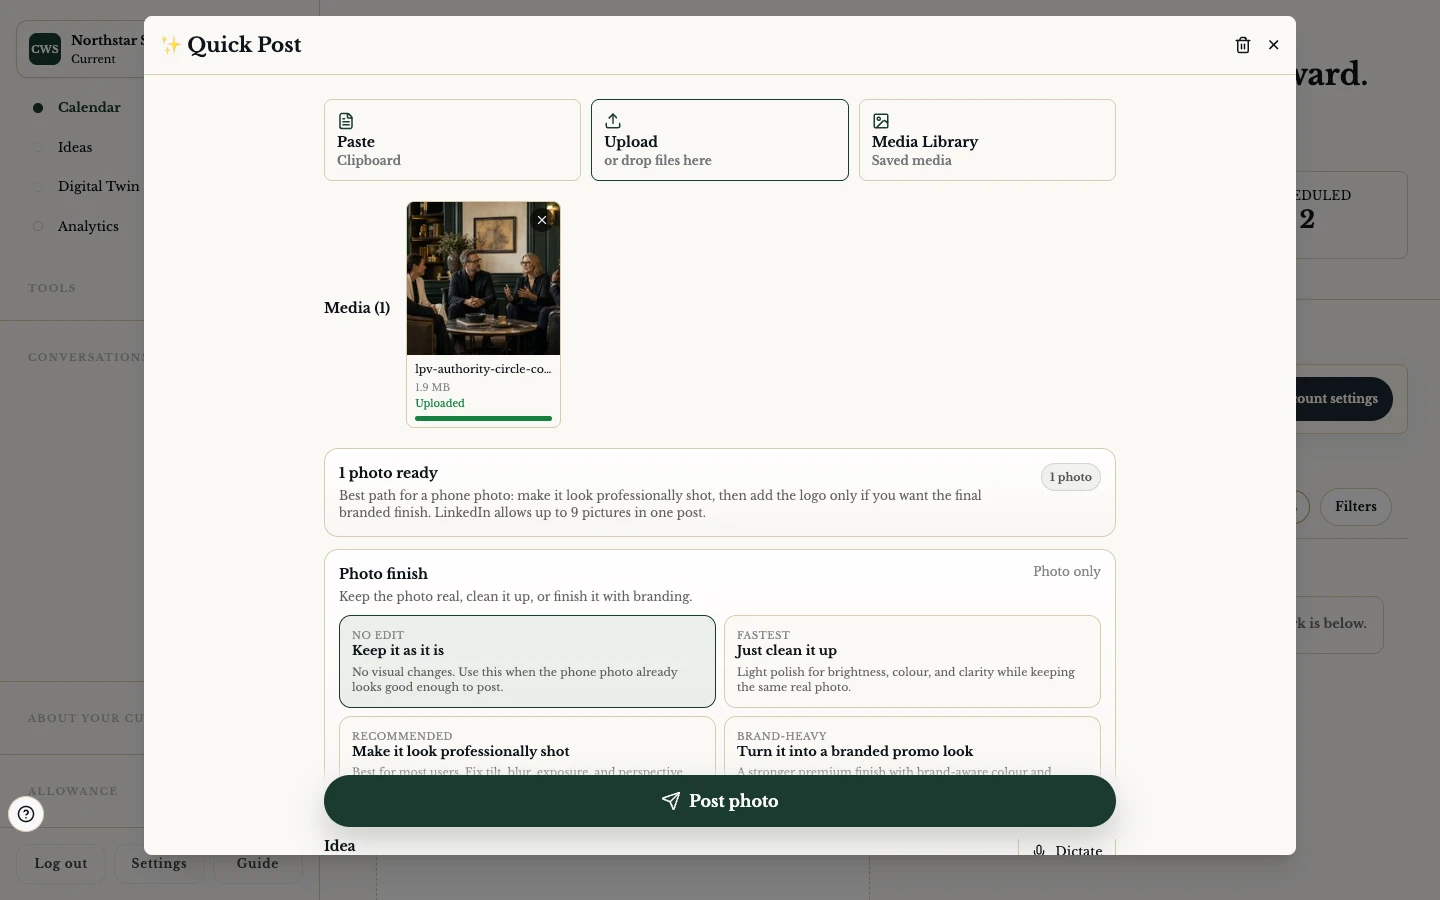
QuickPost is built for the moment when the photo is useful but not quite ready. Upload one image, choose how much change you want, and keep the original context in view. The four photo-finish choices are Keep it as it is, Just clean it up, Make it look professionally shot, and Turn it into a branded promo look. A separate logo option can be available for the edited result.
The safest choice is often the smallest one. A provider may alter colour, texture, people, or small details. Compare the candidate with the source before you save it. The system keeps an edit lineage so an undo or another request can work from the valid current source; that is a recovery aid, not a promise that every generated result is identical.
How it works
- Open QuickPost and add a single photo, or choose an existing photo from the supported media picker.
- Select one of the four visible photo finishes and choose whether the optional logo treatment belongs on the result.
- Let the configured image provider return a candidate. A slow, rejected, or incomplete response can leave the current image in place.
- Compare the candidate with the source. Check faces, hands, products, text, colours, and consent.
- Save the useful version to the post draft, or undo and try a narrower request.
Choose the right level of change
Keep it as it is. Use the original when the phone photo already says what you need.
Just clean it up. Ask for modest brightness, colour, and clarity improvements while keeping the same real photo.
Make it look professionally shot. Ask to correct tilt, blur, exposure and perspective without intentionally changing the real scene. Inspect edges, people, products and background details.
Turn it into a branded promo look. A stronger promotional treatment can reshape the presentation. Review product accuracy and any provider-generated lettering closely.
Optional logo. Where the configured brand path is available, check the logo position, clear space, and approved version. Branding does not correct an inaccurate image.
Supported workflow and limits
The photo-finish panel is part of the web QuickPost flow. Uploaded photos can be the primary visual reference, and saved photos are available where your account allows them. Results, edit quality and native handoff can vary. Compare each result with the source, and keep customer images private unless you have permission to share them.
FAQs
Is my original overwritten?
The edit flow keeps current image lineage and supports an undo path. Still save or retain your source according to your own records.
Can it add a logo?
The configured brand treatment can use an approved stored logo. Review the result before use.
Can I edit several photos at once?
This page describes the single-photo finish path. Multi-image posts have their own review behaviour.
Does it remove people or objects perfectly?
No. Provider output needs a human check, especially around faces, hands, products, and text.
Is a native editor included on every device?
The web workflow is the reference. Native support must be proven per build.